Lolly 3D Studio renders SVG artwork, 3D models and words in your design system's font as lit stills and loops, with no 3D software to learn. Start with Guided controls, then choose Expert to edit the same scene in more detail.
A scene, in four steps:
- Start Artwork, a model or words, fitted to the preview.
- Light the scene A lighting studio, an environment and the stage behind.
- Give it a finish Matte, metal, chrome, glass, glow and more.
- Export A still or a loop, with or without its background.
Make a first image
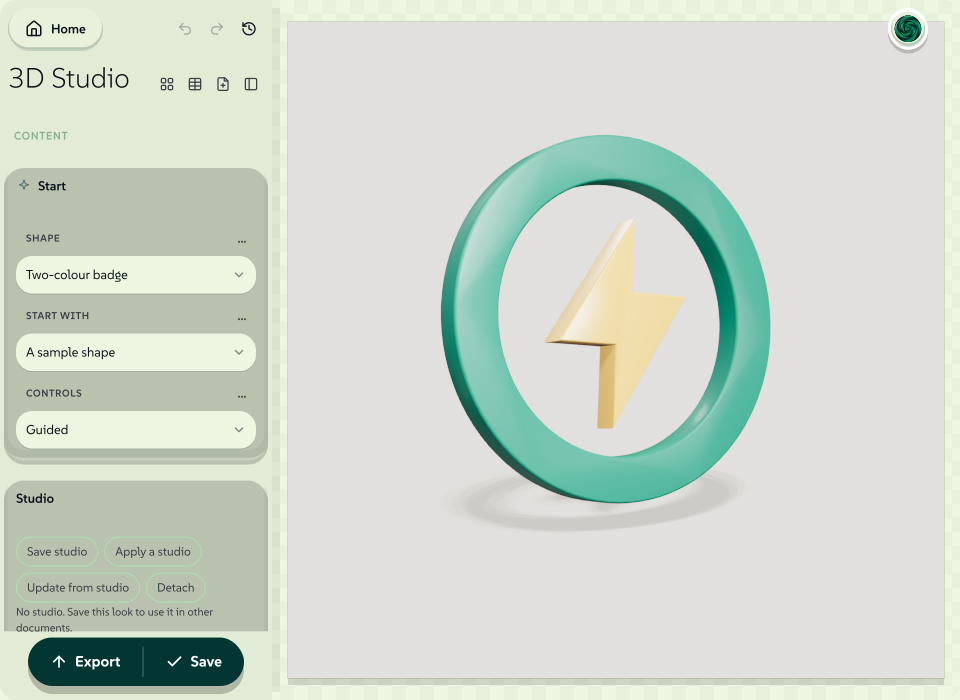
- Open the 3D Studio tool and try the two-colour sample badge.
- Under Start, choose SVG artwork, A 3D model or Words in the brand font. Use the asset picker to select or upload an SVG, GLB, STL or 3MF. Uploads stay on this device for reuse.
- Under Look, choose a lighting studio. Keep the source materials, or apply a colour pair and choose a finish for each colour. An SVG with one or two colours starts with those colours as its colour pair, so Colour A and Colour B change its two parts.
- Choose Fit object, or move the camera on the preview: drag empty space to orbit, drag with Shift or with two fingers to pan and scroll or pinch to zoom. While the preview has focus and nothing is selected, the arrow keys orbit (Shift for larger steps), plus and minus zoom and 0 resets. Reset camera restores the starting view, a double-click frames the object and undo and redo cover each action.
- Click the object, or press Enter with the preview in focus, to select the object. A ring on the floor round the object and two small squares appear. Drag the object to move it along the floor. Drag the ring or its round knob to turn in steps of 15 degrees (hold Alt to turn freely), the square above the object to lift and the square on the ring to scale. While you drag, a number beside the pointer shows the turn, the height or the scale. The height snaps back to the stage near zero. With the object selected, the arrow keys move the object, comma and full stop turn the object, Rest on the stage puts it back on the floor and Escape clears the selection. To tilt or lean the object, choose Tilt: drag sideways to turn, drag up or down to tilt and press comma or full stop to lean. Turn and tilt under Shape holds the same three angles as numbers. The object stays standing on the floor.
- For SVG artwork, adjust Depth and Bevel under Shape. Small details need a smaller bevel.
- Choose the image contents under Output, then export.
 signed by Lollyvector SVG104 paths~5.3k nodes130 groups4 images265 KBCheck it yourselfDapatkan fail yang ditandatanganiTry it in the app

Colour A, colour B, the background and the lights start from your design system's colours, so switching design system or colourway recolours the scene.
What goes in front of the camera
SVG artwork is extruded and bevelled. Each visible solid colour becomes its own material slot. Paint order is resolved before extrusion, so overlapping paths do not flicker. The studio keeps the outline at the sidewall and shrinks a bevel only where a narrow or sharp detail would fold. Source notes reports every reduction with the requested and applied sizes. The saved size stays as requested, so a change to the source or depth checks the bevel again.
How the bevel is checked
An inward bevel contracts the faces. Before building the bevel, the studio follows the contracted outline and holes through every bevel step and checks three things: no edge reverses, no outline or hole collapses and no two edges touch or cross, including a hole growing past its outline. A size that fails is halved until it passes. Bevel thickness is limited to half the extrusion depth. Rings, letter counters and other shapes with curved holes keep their full bevel wherever the geometry allows.
A 3D model can be a GLB, STL or 3MF file. A GLB in Keep source materials mode keeps its own materials and textures, and a 3MF keeps its base and vertex colours. An STL without usable normals gets flat normals computed per facet, and Source notes records the fix.
Words in the brand font sets up to eight lines in your design system's sans, display or mono face, or any font added under Brand fonts. Weight picks the instance, and Expert mode adds letter spacing, line height and alignment. Words face the camera by default. Pose applies Turn and tilt instead, and turning words on the preview chooses that pose. The letters are shaped by the same engine that outlines text in exports, so ligatures and kerning are the font's own. Words take colour A, and a colour A edit reaches words and STL models straight away. In an arrangement, a Words row sets its own text and shares the scene's font settings. A role the design system does not define falls back to its main face, and a font missing on this device is reported rather than replaced.
Several objects together and A collection put more than one thing in the picture; see Groups and sets.
A table of numbers belongs in Lolly Chart, whose 3-D renderer draws data as bars, tiles, a city of values or a spiral, with a camera you can drag.
Light the scene
The lighting studios include soft, dramatic, cool and warm starting points. Contrast balances key and fill light, Shadow softness changes the apparent size of the source and Exposure sets the final brightness.
 signed by Lollyvector SVG119 paths~4.1k nodes132 groups2 images235 KBCheck it yourselfDapatkan fail yang ditandatanganiTry it in the app

Choose Move lights in the studio's controls to show each light as a coloured handle. Drag a handle to orbit that light around the subject. With the preview focused, the arrow keys turn the selected light, plus and minus move the light closer or further and the square brackets select the previous or next light. Shift makes larger turns, each step is one undo entry and Escape returns to camera orbiting. A preset studio keeps moved lights as Key light position, Fill light position and Rim light position under Lighting in Expert mode. The key reflection card follows the key light. Handles never appear in an export.
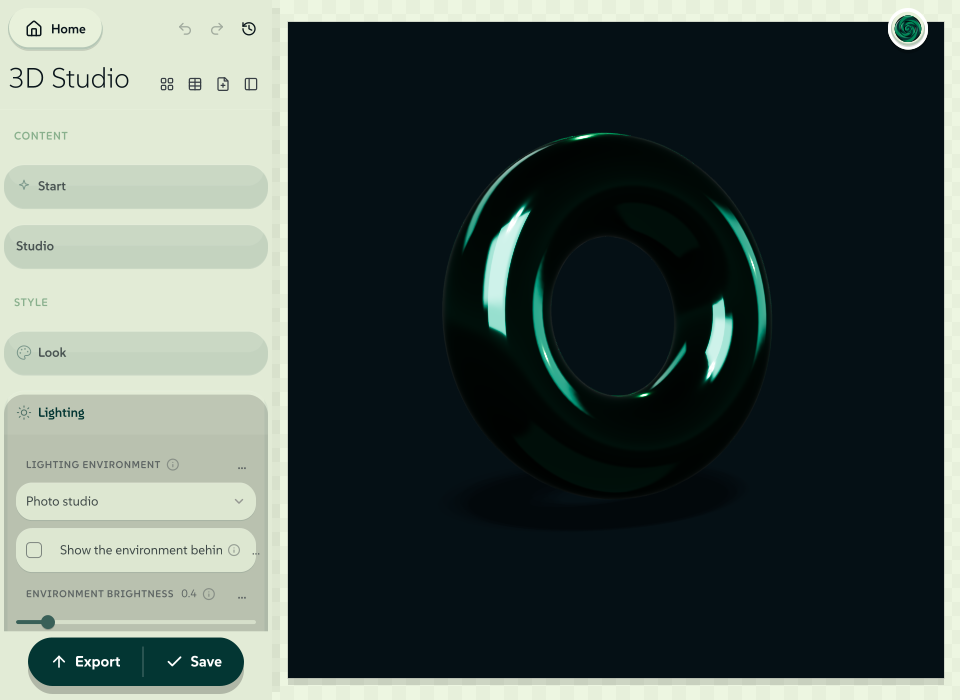
Under Lighting, the Lighting environment adds soft illumination and reflections. The generated environments are built on this device and need no file:
- Studio room, Photo studio, White gallery, Soft box and Window light for product work;
- Warehouse, a daylit industrial space with a brand-tinted accent wall;
- Main stage, coloured spotlights in colour A and colour B with an accent-coloured screen;
- Desert chrome, a blue sky and sand reflection;
- Synthwave chrome, a neon grid in colour A under a striped sun in colour B.
The coloured environments rebuild when the colours change. Environment brightness scales illumination and reflections together, and Environment rotation places the highlights. Show the environment behind the scene works for every environment, and a painted one shows crisp at zero Background blur.
Imported radiance map lights the scene with your own equirectangular panorama, a Radiance .hdr or OpenEXR .exr file. The file is checked by its bytes. A PNG or JPEG is refused, because a display image cannot light a scene. The map is decoded as linear radiance and filtered once for reflections. Exposure is applied only at delivery. Show the map behind the scene draws the map behind a scene image, softened by Background blur. Transparent outputs use the map for light only. An editable .lolly file carries the uploaded map to another device. Image-based light casts no shadows of its own. The studio's lights stay the shadow sources.
Under Stage, choose a background colour, gradient or image, such as a PNG made with Backdrop. A background image does not light the scene.
Finishes and materials
Beyond matte, satin, enamel and metal:
- Chrome is a mirror, and Clay a soft dead matte.
- Velvet adds the fuzz of fabric at grazing angles.
- Glow and Neon light a region in its own colour, Neon more strongly; Glow halo under Look sets the soft spill around them.
- Glass and Frosted glass let light through, so they belong in a complete scene. A transparent output shows them as solid crystal and adds a note.
- Pearl and Iridescent shift colour with the viewing angle.
The two finish controls alternate across an SVG's colour slots. Turn on Separate face, bevel and side finishes to give each region a matte face, a polished bevel or a metallic side. These assignments apply to SVG artwork and the sample badge. Imported meshes keep their own surface layout.
Colour A and colour B are material colours, not output pixels. Light, finish and exposure change how they render. The stage background passes through the same tone mapping, so it does not export as its exact swatch. At the default exposure of 1.1, a solid #30ba78 background renders as #61c992.
The background also tints a soft fill light from below while colour A lights from above, so changing the background changes the subject's shading slightly.
Depth of field and depth forms
Turn on Depth of field to soften objects away from the camera's focus. Choose Pick focus and click the subject. Auto focus follows the camera target again. Expert mode takes a focus distance as a number. Higher render sample counts make the blur and shadows smoother.
Foreground and background forms adds forms in front of and behind the subject. Depth forms chooses copies of the subject at other sizes and angles, or soft spheres in the brand colours. Depth spread keeps them close at 0 and pushes them far out at 1. Expert mode sets how many there are. The arrangement follows the saved seed, so it reproduces exactly. The forms appear in scene images only.
Make it move
Motion chooses what the subject does over the loop. Loop seconds sets how long one loop takes and the starting clip length. The export panel can record more or less. Still image, the default, holds the subject in place.
| Loop | What the subject does |
|---|---|
| Turntable | Turns through the turn angle. |
| Hover | Floats up and back down with a small sway. |
| Pulse | Breathes in and out by a few percent. |
| Wobble | Rocks side to side three times and settles. |
| Pop | Winds up, collapses away, comes back past its size and settles. |
| Coin flip | Throws up through one flip and squashes a little on landing. |
| Jump | Crouches, stretches through the arc, squashes and settles. |
| Spin and land | Lifts, drops turning once, bounces to a stop and holds. |
| Burst | Breaks into its own triangles, flies them out and brings them back whole. |
Motion amount scales how far a loop travels (Turntable uses Turn angle instead). Rest between loops sets how long Pop, Coin flip, Jump, Spin and land and Burst pause before going again. Every loop starts and ends where you placed the subject. The subject's lowest point stays on the floor, and at the largest amount the subject stays inside the studio's shadow. An arrangement moves as one group about the middle of its footprint. Burst is deterministic. Burst shatters the cast shadow with the object and shrinks pieces instead of fading them, so Burst works in cut-out outputs too. Pieces fly about 2 studio units at a motion amount of 1. Burst handles up to 250,000 triangles per object. A heavier model keeps its shape, and Source notes gives the count.
Camera keys and moves
Orbit to a first view and choose Add camera key on the preview, then orbit to the next view and add another. Two keys make a move. Up to twelve make a path, spaced evenly as you add them. Play path plays the path, and the export panel offers the path as video or GIF at the loop length. Hold the current view keeps the picture still while you compose the next key. Under Motion, each key lists when it is reached, its angle, field of view, zoom, target and focus distance, all editable. Each key can take a name of up to 40 characters. Go to key shows the next saved key and moves only the camera. Turn Play path off to hold that view. Camera easing slows into each key, flows through them or keeps a constant speed. Return to the first key closes the loop for a GIF.
Camera also offers five moves built from the view you composed:
- Orbit sweep turns a little each way and comes back.
- Push in comes closer over the loop; with Return to the first key off, it holds the close view.
- Dolly zoom narrows the lens from 60 to 24 degrees while the camera pulls back, so the subject stays the same size while the background slides. An orthographic camera has no lens to change.
- Reveal turn swings in from one side, a little further back and 30 degrees up, and settles on your view once.
- Crane comes down from above while the framing closes in.
Camera amount scales a move, and the key list hides while a move is chosen. Convert to keys on the preview turns any move into ordinary keys, in one undo step.
Light motion
Orbit the studio sweeps the light rig around the object and back. Gently breathe varies the light intensity. Light motion amount sets the range. Brand light colours do not change, and the lights return to their start at each loop boundary.
An object loop, a camera move and animated lights run over the same loop seconds. A turntable closes its pose only when its turn angle is a whole number of rotations.
Start from a template
Templates open on a finished loop. Wordmark backdrop sets your words in the brand font and Icon backdrop starts from the sample badge. Both combine the dramatic studio, copies of the subject drifting in depth, orbiting lights and a slow camera move. Logo drop drops a badge in turning and bounces the badge to a stop. Bouncing icon jumps the sample badge under a soft studio. Shatter reveal breaks the subject into triangles while the camera swings round. Swap in your own words or icon under Start, then export. A brand pack can add its own models and templates, shown only where that pack is installed.
Get the file you need
Output chooses what the image contains, and the format decides how transparency is kept:
| Format | Complete scene | Object with transparent shadow, or Object only |
|---|---|---|
| PNG, WebP, AVIF | Kept | Transparency kept |
| APNG, animated WebP | Kept | Transparency kept, frame by frame |
| GIF | Kept | Hard edge: a pixel less than half opaque becomes a hole |
| JPEG | Kept | Flattened (no alpha) |
| TIFF | Kept | Flattened onto white |
| MP4, WebM | Kept | Every frame flattened onto white |
Use Object with transparent shadow and PNG to place the object over another background, and Object only to drop the cast shadow too. For a soft edge in motion, use APNG or animated WebP.
The export panel's size and DPI render the scene again at that pixel size, up to 4096 pixels per side and 12 million pixels. Every still format does this. A video or GIF frame uses Clip samples (16 by default) instead of the still's render samples. A higher count gives smoother depth of field and a longer export.
Fit object centres the subject with a margin at the current aspect ratio and keeps the viewing angle and field of view. Fit again after changing the output proportions or the object's pose. Camera gestures, fit, reset and focus picking use the normal undo history and are saved with the session.
Curve detail
Curve detail chooses how a curve becomes straight pieces. Fixed count uses the Curve count, 8 to 64 (24 by default), at every size. Follow the output size reads the count from the image being made and keeps the error inside a quarter of a pixel at the Fit object framing, up to 64 pieces or the one-million-triangle budget. A 4096-pixel image of a curved ring takes 47 pieces per curve, and a 64-pixel thumbnail takes 8. The preview is built at preview size. An export is built at the size it renders, including a link's own size, a batch row's size and each page of a paged set.
Groups and sets
Arrange several objects
Choose Several objects together under Start with for an icon cluster, a product line-up or a hero object with supporting pieces. Add objects on the preview opens the library and keeps the library open. Every icon, logo or model you choose becomes an object, and Done frames the group. Dropping SVG, GLB, STL or 3MF files on the Objects list does the same with your own files. Each row is one SVG, GLB, STL, 3MF or sample shape, named after its file and placed in the next free spot. Each row has its own position, rotation, scale, Rest on the stage and Visible switches. Objects that name the same file share its loaded geometry. Add object adds one row of a chosen kind and waits for its file without disturbing the scene. Lighting, colours, finishes, extrusion, stage and camera are shared.
On the preview, click to select an object and drag to move one. A drag on empty space orbits the camera, and a click there clears the selection. With the preview in focus, Enter selects the object too. The selected object shows the same ring and squares as a single object. While a Motion plays, the ring and squares are hidden, because the object is not at its rest place. They return when Motion is Still image. With an object selected, the arrow keys move the object, comma and full stop turn the object, the square brackets select the previous or next object and Delete removes the selected object. The object's name in the studio's controls opens the list of objects. Duplicate, Remove, Rest on the stage and Tilt act on the selection. On a wide screen they stand under the selected object, and on a phone they are in the row of controls. Move lights makes a drag move the lights. View, Frame all, Fit selected and Reset camera frame the picture. Two fingers, a pinch and the scroll wheel move the camera at any time. Every step is one undo entry with a number in the row. The controls sit beside the picture at the size of the screen: above the picture on a wide screen and in one row above Export on a phone. Source notes at the end of the row opens the notes on the scene.
Objects rest on the stage by default. Turn Rest on the stage off to let one float or sink. Lift Y works either way. Source notes reports the object count, the triangle total, the selected object's material slots and any pair of objects that overlap by more than a small margin. Focus picking and the transparent shadow work across every object. A broken file says which object it belongs to. In Expert mode each row can bind its own material slots and carry a Stable id for automation. Turn and tilt, Object position and Object scale under Shape apply to single-object scenes only.
Build and review a collection
Choose A collection under Start with for a consistent set, such as twelve icons rendered the same way. Drop several SVG or model files onto Collection items, or use Add item. An item can also be Words. Lighting, colours, finishes, background and camera are shared. Preview item picks the object on the main canvas. Dragging that object records a framing override for that item alone, and so does Pick focus. Turn off Own focus distance to use the shared focus again. Use shared framing removes the override. Each row's Item size, Nudge X and Nudge Y bring icons drawn at different weights to the same apparent size. The size multiplies the shared scale, and the nudges add to the shared position. In Expert mode a row's Stable id addresses its overrides, so reordering cannot move one item's framing onto another. Delivered file names follow the saved order.
Review collection opens a contact sheet with fifteen of the shared controls. One edit there refreshes every tile. A Studio control applies a saved studio to the whole set. Each tile renders at the saved image size reduced to 512 pixels on the long side, and the footer states both sizes. Failed sources are listed by item and must be fixed before exporting. Download sheet saves the sheet as one PNG, with each name under its tile. Export PNG set renders every item at Collection image size from a snapshot of the current settings. The export numbers repeated names and has progress, cancellation and download recovery. The sheet and the PNG set show the start of the loop. For motion, export the selected item as video.
Reuse a look
Save the scene as a session to reopen it, or use Save as a template for a starting point. Lolly 3D Studio also saves as you work. Earlier versions are under History (Go back to an earlier version). A share link carries settings and asset references. Use an editable .lolly file when another device also needs your uploads.
Save studio keeps the look of the current document as a reusable studio: the lights and their animation, the environment, materials, finishes and colours, stage, extrusion, depth of field and forms, exposure, render quality, projection, field of view and the motion. A studio leaves out the subject, the framing, the collection and the output. Apply a studio writes that look into the current document and keeps its subject, orbit, zoom, pan and focus. These actions are in the sidebar's Studio section. A collection or arrangement takes a studio the same way and keeps each item's own framing, focus and material roles.
Each document remembers its studio and the controls you changed afterwards. Editing a saved studio changes nothing until a document chooses Update from studio, which refreshes every control you did not change. Detach stops following the studio. A studio lives on your profile and backs up with your other work. A link or .lolly file carries the resolved values, so the recipient sees the look without having the studio.
For many variants, use Lolly's batch workflow. Keep the same lighting, material and camera values in each row and vary artwork or modelAsset. Save a framing override where a shape needs one. Make variants edits several sessions side by side. Its shared controls change them together, and the active cell orbits while the others stay still. Later edits to a template do not change sessions already made from that template.
Place a scene in Lolly Design
Choose 3D scene from the add menu on Lolly Design's tool rail and drag out a frame. Lolly 3D Studio opens on the new box. Otherwise a scene box is an ordinary box: move it, resize it, give it a shadow, put it on a slide or the timeline.
- It keeps the recipe, not a picture. The box stores the scene as Lolly 3D Studio's own link settings and re-renders at the size and moment the document asks for.
- Edit it in the studio. Select the box, then choose Edit in 3D Studio in the Inspector's 3D scene section. Apply writes the edit back as one undo step. Closing without applying changes nothing.
- One live scene, posters elsewhere. Every scene box shows a still poster, drawn off screen at the box's size. Only the selected box is a live scene, for looking at but not orbiting. A document with twenty scenes still runs one live renderer, and a document with no scene box loads no 3D code. A device that cannot open a floating-point graphics context keeps the poster and explains why in the box.
- On the timeline, a scene box follows the playhead like a video clip. Its start, clip-in and speed move through the scene's own loop, which comes from Lolly 3D Studio, not Lolly Design's keyframes. Trimming the box shows less of the scene and does not speed the scene up.
- In an export, each scene is drawn fresh at the size the file needs, one frame per moment in a video. A scene that cannot be drawn fails the export with the studio's reason.
- Sharing. A share link carries a scene's device-local upload id, not the upload, so on someone else's device that picture falls back to the studio default. Send a
.lollyfile to include the upload.
A studio link placed in another document, or embedded as a tool image, arrives as a picture rendered at export quality.
Expert controls
Expert mode exposes object transforms, perspective or orthographic projection, the camera target and focus distance, individual light strengths and colours, reflection settings and the export sample count. Switching back to Guided keeps those values.
- Custom lights builds a rig of up to eight directional, point, spot or rectangular area lights aimed at the centre of the studio. Up to four can cast shadows. Rectangular area lights give illumination and reflections. The other kinds give cast shadows. A moved light in a custom rig writes its own row.
- Override selected slots sets colour, roughness, metalness and clear coat for individual materials, found under Material slots and source notes on the preview. A colour override replaces that slot's colour texture. Unselected GLB materials stay intact. In an arrangement or collection every object needs the named slot, or the scene stops with an error that says which object. Two overrides on one slot are also an error.
- Material A slot and Material B slot bind the colour pair to exact source names or numbers. Leave both empty to alternate the pair across slots. With explicit bindings, other slots keep their original materials.
- Orthographic projection keeps parallel edges parallel and does not use photographic depth of field. For a consistent icon set, keep the camera, scale, lighting and materials together as one saved starting point.
Limits
- SVG: up to 1 MB, 128 paths and 16 solid colours. Convert text, linked content, filters, masks, gradients and transformed or dashed strokes to plain filled paths first. A shape that would pass one million triangles once bevelled is extruded without a bevel.
- GLB and STL: up to 32 MB and one million triangles. Export GLB without Draco, Meshopt or KTX2 compression; embedded textures can be up to 8192 pixels per side. Model animation clips are not played.
- 3MF: up to 128 MB and one million triangles. Core meshes, base and vertex colours, units, build transforms and multipart projects such as Bambu Studio's come in. Slicer settings, painted filament assignments and texture properties do not.
- Model size: the longest side is always scaled to 3.25 studio units. Source notes gives the file's own size, such as
Model spans 120 by 48 by 9 units in its file; shown at 3.25 studio units., in millimetres for a 3MF. STL gives a visual mesh. The studio does not infer print units or certify a printable object. Native CAD documents must be exported as a supported mesh first. - Arrangements: up to 16 objects and one million visible triangles, sharing one extrusion depth and bevel. Collections: up to 24 items. Separate render passes and editable mesh export are not available.
- Radiance maps:
.hdrand.exrup to 64 MB and 8192 by 4096 pixels; maps narrower than 512 pixels are replicated before filtering. - Output: SDR rendering, up to 4096 pixels per side and 12 million pixels. The preview uses fewer samples than an export. The renderer needs WebGL2 with float render targets, in addition to the browser support Lolly needs (Supported environments).
- Lighting is rasterised with sampled shadows and a reflection environment, not full path tracing. Transparent shadows keep the saved camera and ground plane and do not relight another image after export. A frame that renders empty fails the export instead of saving a blank file.
Section links from the earlier guide
- Light the scene
- Start from a template
- What goes in front of the camera
- Camera keys and moves
- Light the scene
- Light the scene
- Get the file you need
- Get the file you need
- Arrange several objects
- Start from a template
- Reuse a look
- Reuse a look
- Make it move
- Make it move
- Camera keys and moves
- Expert controls
- Expert controls