
3D Studio turns SVG icons, logos and imported meshes into still images and turntables. Start with Guided controls, then choose Expert to edit the same scene in more detail.
Make a first image
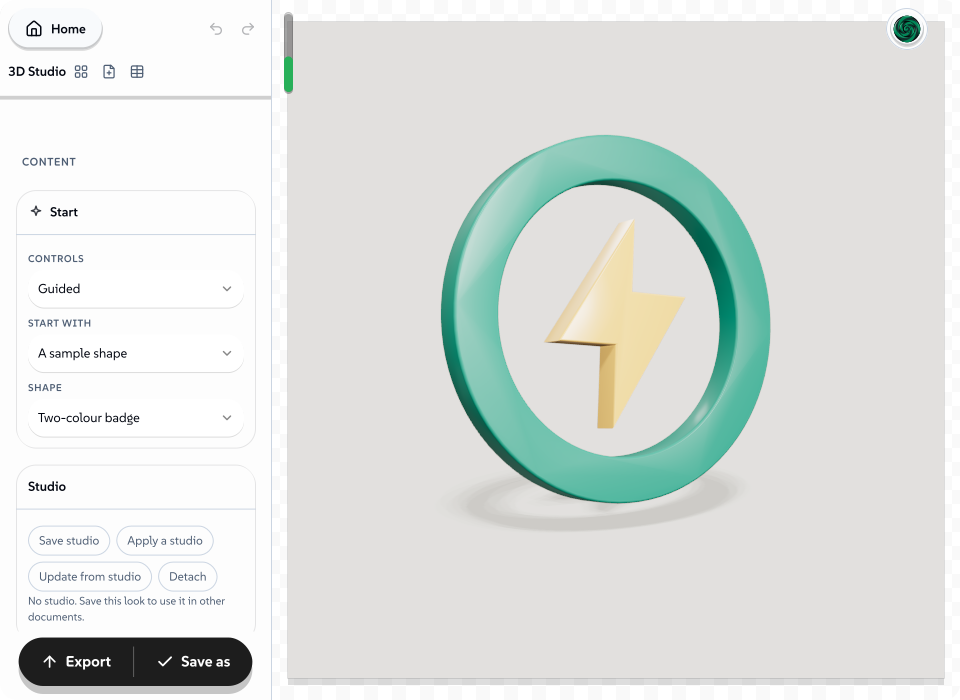
- Open 3D Studio and try the two-colour sample badge.
- Under Start, choose SVG artwork, A 3D model or Words in the brand font. Use the asset picker to select or upload an SVG, GLB or STL. Uploads are stored on this device for reuse.
- Under Look, choose a lighting studio. Keep the source materials, or apply a colour pair and choose a finish for each colour.
- Choose Fit object, drag the preview to orbit, or use the arrow keys while it has focus. Shift moves in larger steps. Reset camera restores the starting camera; undo and redo recover each action.
- For SVG artwork, adjust Depth and Bevel under Shape. Small details need a smaller bevel.
- Choose the image contents under Output, then export.
 signed by Lollyvector SVGПровери самВземи подписания файл95 paths~5.2k nodes119 groups4 images294 KBTry it in the app

Use Object with transparent shadow and PNG for an object you can place over another background. Object only removes the cast shadow too. JPEG has no transparency. The export panel's size, scale and DPI settings render the scene again at that pixel size, up to 4096 pixels per side and 12 million pixels, so a large export carries real detail rather than an enlarged preview. Every still format takes that route: TIFF as well as PNG, JPEG, WebP and AVIF, and the BMP and CMYK TIFF exports other tools offer. A video or GIF frame takes Clip samples (16 by default) rather than the still's render samples, because motion hides sampling noise and a clip is hundreds of frames; raise it for a smoother depth of field at the cost of export time.
Light, materials and depth
The lighting studios include soft, dramatic, cool and warm starting points. Contrast changes the balance between key and fill light. Shadow softness changes the apparent source size. Exposure adjusts the final image brightness.
 signed by Lollyvector SVGПровери самВземи подписания файл107 paths~4.0k nodes125 groups2 images252 KBTry it in the app

Finishes go beyond matte, satin, enamel and metal: Chrome is a mirror; Clay is a soft dead matte; Velvet adds the fuzz of fabric at grazing angles; Glow and Neon light a region in its own colour, Neon more strongly, and Glow halo under Look sets the soft light that spills around them, which a transparent output keeps as partial alpha; Glass and Frosted glass let light through, so they belong in a complete scene, and a transparent output shows them as solid crystal and says so in the notes; Pearl and Iridescent shift colour with the viewing angle. Every finish is available per region, per face, bevel and side, and as a named finish on a material override.
An SVG keeps each visible solid colour as a separate material slot. Its paint order is resolved before extrusion so overlapping paths do not flicker. The two finish controls alternate across those slots. Enable Separate face, bevel and side finishes to give each colour region a matte face, polished bevel or metallic side. Each surface can inherit its region finish. These assignments apply to SVG artwork and the sample badge; imported meshes keep their authored surface layout. A GLB in Keep source materials mode retains its authored materials and textures.
Turn on Depth of field to soften objects away from the camera's focus distance. Foreground and background forms adds opaque forms at different sizes and distances in front of and behind the subject. Depth forms chooses what they are: copies of the subject, which reuse its geometry, materials and colours at other sizes and angles, or soft spheres in the brand colours. Depth spread keeps them near the subject at 0 and pushes them far in front of and behind it at 1; Expert mode also sets the number of forms. The arrangement follows the saved seed, so it reproduces exactly, and the forms appear in scene images only. This is a camera effect on real geometry. Higher render sample counts make the blur and shadows smoother. With depth of field enabled, choose Pick focus and click the subject. A missed click keeps the current focus; Escape cancels picking. Auto focus follows the camera target again. Expert mode also accepts a numerical focus distance.
Under Stage, choose a background colour, gradient or image. A PNG made with Backdrop can supply the visible background. A background image does not become a lighting environment.
Promotional backdrops
The quickest route to an animated backdrop is a template: Wordmark backdrop sets your words in the brand font and Icon backdrop starts from an icon (swap in your own SVG under Start). Both ship with Lolly itself; SUSE wordmark backdrop and SUSE icon backdrop come with the SUSE brand pack, so they appear on a SUSE install only. Each combines the dramatic studio, copies of the subject drifting in depth, orbiting lights and a slow looping camera move, so the first export as video or GIF is already a finished loop. Change the words or the icon, adjust the depth spread and the camera keys, then export.
Three more templates open on a finished loop of the subject itself: Logo drop drops a badge in turning and bounces it to a stop under dramatic light, Bouncing icon jumps an icon under a soft studio with the lights orbiting, and Shatter reveal breaks the subject into its own triangles while the camera swings round onto the view. Motion below says what each loop and each camera move does.
Words in the brand font
Choose Words in the brand font under Start with and type the words, up to eight lines. Font offers the brand roles, brand sans, display and mono, plus any font added under Brand fonts; Weight picks the instance, and Expert mode adds letter spacing, line height and alignment. Words face the camera by default, because a wordmark reads best square to the lens; Pose applies the object rotation from Camera instead. The letters are shaped on this device by the same engine that outlines text in exports, so ligatures and kerning are the font's own, and the outlines are extruded and bevelled exactly like artwork. Words are one material region and take colour A. A role the brand does not define falls back to its main face, and a font that is not available on this device says so rather than substituting silently.
In an arrangement, a Words row sets its own text and shares the scene's font settings, so a title and an icon cluster sit together under one light.
Move the camera
A still image holds the view you compose. For motion, orbit to a first view and choose Add camera key on the preview, then orbit to the next view and add another. Two keys make a move; up to twelve make a path. Play path plays it in the preview, and the export panel offers the clip as video or GIF at the loop length. Choose Hold the current view (or Play path again) to compose the next key while the picture stands still; the saved keys stay.
Under Motion, each key lists the moment it is reached as a percentage of the loop, its angle, field of view, zoom, target and focus distance, so every value can be typed. Keys are spaced evenly when added. Camera easing slows into and out of each move, flows through every key with continuous speed, or keeps a constant speed. Return to the first key closes the loop for a GIF. A camera path, a turntable and animated lights combine over the same loop seconds.
Camera also offers five ready-made moves built from the view you have composed, listed under Motion below. A move hides the key list while it is chosen, and Convert to keys on the preview hands you its rows so you can edit them like any other key.
Each key takes a name of your own, kept to 40 characters. Go to key on the preview shows the next saved key, one press per key, and says which one it reached, so you can return to a view and compose the next one from it. It moves the camera and nothing else, so with Play path on, the preview carries on travelling; turn Play path off to hold the view. A key left unnamed reads and renders exactly as it did before.
Place the lights
Choose Move lights on the preview to see each studio light as a coloured handle with a line to the subject. Drag a handle to orbit that light around the subject at its current distance. With the preview focused, the arrow keys turn the selected light, plus and minus bring it closer or push it further away, and the square brackets select the previous or next light. Shift makes larger turns. Each step is one undo entry. Escape returns the preview to camera orbiting.
A preset studio remembers moved lights as Key light position, Fill light position and Rim light position under Lighting in Expert mode; the key reflection card follows the key light. A custom rig writes the moved light's own row. Handles appear in the preview only and never in an export.
Lighting environments
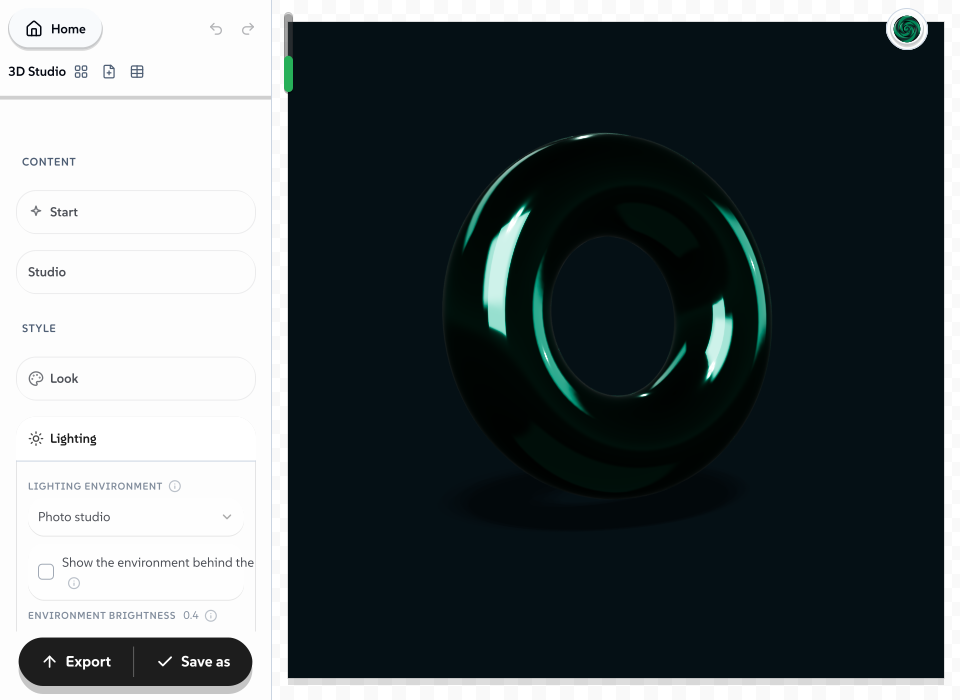
Under Lighting, the Lighting environment supplies soft illumination and reflections. The generated environments are built on this device and need no file: Studio room, Photo studio, White gallery, Soft box and Window light for product work; Warehouse for a daylit industrial space with a brand-tinted accent wall; Main stage for coloured spotlights in colour A and colour B with an accent-coloured screen behind; Desert chrome for the classic blue sky and sand reflection; and Synthwave chrome for a neon grid in colour A under a striped sun in colour B. Change the brand colours and the coloured environments rebuild. Environment brightness scales the environment's effect on illumination and reflections together, and Environment rotation turns it to place highlights. This renderer does not split illumination from reflections. Show the environment behind the scene works for every environment; a painted one shows crisp at zero Background blur.
Choose Imported radiance map to light the scene with your own equirectangular panorama. Upload a Radiance .hdr or OpenEXR .exr file through the asset picker. The file is checked by its bytes: a PNG or JPEG is a display image and is refused, because it cannot light a scene. The map is decoded as linear radiance, filtered once for reflections, and exposure is applied only at delivery. Show the map behind the scene draws the same map, softened by Background blur, behind a scene image; transparent outputs keep the map for lighting and reflections and never draw it. The uploaded bytes stay on the asset rail, so an editable .lolly file carries them to another device.
Radiance maps are limited to 64 MB and 8192 by 4096 pixels. Maps narrower than 512 pixels are replicated pixel for pixel before filtering. Image-based light does not cast shadows of its own: the studio's directional and spot lights remain the shadow sources.
Colour and alpha
Colour A and colour B are material colours, not output pixels. Lighting, finish and exposure all change how they render, so a lit face in colour A comes out lighter or darker than its swatch. A colour A edit reaches words and STL models straight away, without reloading the source.
An STL that carries no facet normals, or whose normals are all zero, used to render as a black solid with neither its colour nor its finish. The studio computes the normals from the triangles instead, and Source notes records that it did. STL is a facet format, so the computed normals are flat, one per facet.
The stage background is part of the scene. A solid, gradient or image background passes through the same tone mapping and exposure as the subject, so it does not export as its exact swatch. At the default exposure of 1.1, a solid #30ba78 background renders as #61c992; Chromium's software renderer (SwiftShader) and Metal on an Apple M4 both gave that value. The background also tints a soft fill light from below, with colour A from above, so changing the background changes the subject's shading slightly. That tie is part of the saved scene rather than an accident of the renderer, and it runs both ways: a colour A edit moves the fill light as well as the materials.
Object only and Object with transparent shadow keep their transparency in PNG, WebP and AVIF, and in the two animated stills, APNG and animated WebP, which carry the full alpha channel frame by frame. The other formats fill the transparent areas, or keep less of them:
- JPEG has no alpha channel.
- TIFF flattens them onto white.
- WebM and MP4 flatten every frame onto white.
- GIF keeps a hard-edged transparency: a pixel less than half opaque becomes a hole, and everything else is drawn. GIF has one bit of alpha, so a soft shadow edge steps rather than fades. For a soft edge, export APNG or animated WebP, which keep the full alpha channel. For a flat card behind the subject, choose Complete scene under Output with the background you want.
Shape quality and framing
The studio keeps the SVG outline at the sidewall and contracts the faces for an inward bevel. Before it builds the bevel, it follows the contracted outline and holes through every bevel step and checks three things: no edge reverses, no outline or hole collapses and no two edges touch or cross, which includes a hole growing past its outline. A requested size that fails is halved until it passes; bevel thickness is also limited to half the extrusion depth. Rings, letter counters and other shapes with curved holes keep their full bevel wherever the geometry allows it; a bevel is reduced only where a narrow or sharp detail would really fold. The one exception is a shape that would pass one million triangles once bevelled: it is extruded without a bevel. Source notes reports every reduction with the requested and applied sizes and correction guidance. The saved requested size stays intact, so changing the source or depth re-evaluates it.
Curve detail chooses how a curve becomes straight pieces. Fixed count flattens every curve into the same number of pieces whatever size you export: the Curve count value, 8 to 64, 24 by default. Follow the output size reads the count from the image being made instead, keeping the flattening error inside a quarter of a pixel at the framing Fit object gives, and never going past 64 pieces or the one-million-triangle budget. A 4096 pixel image of a curved ring takes 47 pieces per curve where a 64 pixel thumbnail takes 8. The count is chosen for each shape from the artwork itself, so a plain outline stays light while a finely drawn one gets what it needs, and Curve count is ignored while the detail follows the output. The preview is built at preview size; an export is built at the size it renders: the width, height and DPI in the export bar, a link's own width and height, the size a batch row renders, and each page's own box in a paged set.
Fit object centres the current transformed subject with a margin at the current image aspect ratio. It preserves the viewing angle and perspective field of view. The camera's target offsets record that framing relative to the expert camera target. Fit again after changing the output proportions or object pose. Camera gestures, fit, reset and focus picking use the normal undo history and saved session values.
Expert controls
Expert mode exposes object transforms, perspective or orthographic projection, camera target and focus distance, individual light strengths and colours, reflection settings, and export sample count. Switching back to Guided preserves those values.
Choose Custom lights to build a rig with up to eight directional, point, spot or rectangular area lights. Up to four lights can cast shadows. Lights aim toward the centre of the studio. Rectangular area lights provide illumination and reflections; the other light types provide cast shadows. Move lights on the preview places any of them by dragging.
Choose Override selected slots to set colour, roughness, metalness and clear coat for individual materials. Open Material slots and source notes on the preview to find their names or numbers. A colour override replaces that slot's colour texture. Unselected GLB materials stay intact. An override picks one slot by name or number, so in an arrangement or a collection every object needs that slot: an object without it stops the scene with an error, and in an arrangement the error says which object it is. Two overrides pointing at the same slot are an error as well.
In colour-pair mode, Material A slot and Material B slot bind those finishes to exact source names or numbers. Leave both empty to alternate the pair across source slots. With explicit bindings, other slots keep their original materials. A missing slot or two roles pointing at the same slot produces an error.
Orthographic projection keeps parallel edges parallel and does not use photographic depth of field. For consistent icon sets, keep the camera, scale, lighting and material assignments together as one saved starting point.
Arrange several objects in one scene
Choose Several objects together under Start with to photograph a group: an icon cluster, a product lineup, or a hero object with supporting pieces. The quickest way in is Add objects on the preview: the library opens and stays open, every SVG icon, logo or 3D model you choose becomes an object, and when you select Done the group is framed. Dropping SVG, GLB or STL files onto the Objects list, or using its choose-files button, does the same from your own files. Each newcomer is named after its file, sized like the objects already there, and placed in the next free spot beside them. Add object adds one row of a chosen kind; an artwork or model row shows its own file picker and waits, without disturbing the scene, until a file is chosen. Each row is one SVG, GLB, STL or sample shape with its own position, rotation, scale, Rest on the stage and Visible switches. Lighting, colours, finishes, extrusion, stage and camera are shared, so the group reads as one photograph. An arrangement holds up to 16 objects and one million visible triangles in total; objects that name the same file share its loaded geometry.
On a phone, or a small render size, the preview toolbar shows short labels so it stays out of the picture. The preview toolbar groups its controls: Orbit, Move objects and Move lights choose what a drag does; Frame all, Fit selected and Reset camera frame the picture; the focus controls appear when depth of field is on. A plain click on an object selects it in any mode, and the selection reads in the status pill. Selected object in the sidebar shows the same row. In Move objects a drag moves the selection across the stage, the arrow keys nudge it, comma and full stop turn it, and the square brackets select the previous or next object. Shift makes larger steps. Every drag and key press is one step in the normal undo history and has a numerical equivalent in the row. Escape returns to Orbit. Frame all fits the whole group; Fit selected fits one object.
Objects rest on the stage by default; turn Rest on the stage off to keep an object centred on its own pivot so it can float or sink, and use Lift Y in both cases. Source notes reports the visible object count, the triangle total, the selected object's material slots and any pair of objects whose volumes overlap by more than a small margin, so an intersection is never a surprise. A turntable turns the whole group about the centre of its footprint. Focus picking and the transparent shadow work across every object, and a broken file says which object it belongs to.
In Expert mode each row can bind its own material A and B slots and carry a Stable id, which survives reordering for automation and saved overrides. Object transforms under Camera apply to single-object scenes only; an arrangement carries them per row.
Build and review a collection
Choose A collection under Start with. The sample badge, sphere and box provide a starting set. Replace them, drop several SVG or model files onto Collection items to add them at once, or use Add item, and give each a useful name. Add item and the asset picker both add to the collection. An item can also be Words, set in the shared font under Start unless the row sets its own. A collection holds up to 24 items.
Lighting, colours, finishes, background and camera settings are shared. Preview item chooses the object on the main canvas. Dragging that preview records a framing override for that item. Its row then exposes its own camera numbers and target offsets. Fit and Reset also affect only that item. Focus picking records a separate per-item focus override; turn off Own focus distance to use the shared focus again. Use shared framing removes the override. In Expert mode, each row can also map its source slots to the shared material pair.
Each row carries its own Item size and Nudge X / Nudge Y. They are corrections, not a second studio: the size multiplies the shared object scale and the nudges are added to the shared object position, so twelve icons drawn at different weights can be brought to the same apparent size without touching anything the set shares. A row left at 1 and 0 renders exactly as it did before these existed. In Expert mode a row can also carry a Stable id. Every override is addressed by that id, so reordering a collection cannot move one item's framing onto another. Delivered file names still follow the saved order.
Open Review collection to see a contact sheet. The sheet carries fifteen of the shared controls: the lighting studio, the materials mode, colour A and colour B, the two finishes, the Separate face, bevel and side finishes switch with its six face, bevel and side choices, the exposure and the collection image size. Editing one of them there edits the same shared studio and refreshes every preview. Where you have saved studios, a Studio control above those settings applies one to the whole set. Edit opens one item on the main canvas. Failed sources are identified by item and must be fixed before exporting from the review.
The sheet renders each preview at the saved image size reduced to 512 pixels on the long side, and its footer states both numbers: what the sheet draws and what a delivered file will be. Download sheet saves the whole sheet as one PNG, the tiles in a grid with each name under its tile and the collection's name at the top.
Export PNG set renders every item at Collection image size and the saved render sample count. It captures a snapshot of the current settings, so edits during the job apply to the next export. Numbered names keep repeated or unusual item names distinct. The existing batch job provides progress, cancellation and download recovery; cancellation stops subsequent items after the current render settles.
The contact sheet shows the start of the animation loop at reduced quality. PNG-set delivery renders that same starting moment. Export the selected item as video for motion.
SUSE models
The SUSE brand pack adds Geeko, Geeko on a branch and Geeko sitting to the model library. Their studio templates, and the Geeko model collection template that opens all three under shared lighting, come with the same pack, so all of them appear on a SUSE install only. The models retain their original materials by default.
Save and reuse
Save the scene as a session to reopen it, or use Save as a template for a reusable starting point. Asset selections refer to stored files. A share link carries settings and asset references; use an editable .lolly file when another device also needs your uploaded assets.
Save and reuse a studio
Save studio keeps the look of the current document as a reusable studio: the lighting rig and its animation, the environment, the materials, finishes and colours, the stage, the extrusion, the depth of field and its forms, the exposure, the render quality, the camera projection and field of view, and the motion. It does not keep the subject, the framing, the collection or the output settings, so one studio photographs many different things. Apply a studio writes that look into the current document and leaves its subject, orbit, elevation, zoom, pan and focus where they are. The four actions sit in the sidebar's Studio section.
Each document remembers which studio it took its look from, and which controls you changed yourself afterwards. Editing a saved studio changes nothing in the documents that use it: each one takes the change when you choose Update from studio, which refreshes every control except the ones you changed. Detach stops following the studio and leaves every value in place.
A collection or an arrangement takes a studio the same way. The shared controls follow the studio; each item's own framing, focus and material roles stay as you set them.
A studio lives on your profile, like a template, so it backs up and restores with everything else. A share link and a .lolly file carry the resolved values, not the studio, so the far side sees the look even when it does not have the studio itself.
Lolly's batch workflow renders the same studio. Create rows with the same lighting, material and camera values, varying artwork or modelAsset. Save separate framing overrides where an object's shape needs them. A template provides a common starting point; later edits to it do not automatically change existing sessions.
Use Make variants for side-by-side editing. Its shared controls change the selected sessions together. Activate a cell to orbit its scene; the other cells retain still previews.
Place a scene in Design
Add a 3D scene from Design's add menu, then use Edit in 3D Studio to open the studio on that box's scene. What you change comes back as one undo step. Unlike an image box, which keeps a rendered picture, a scene box keeps the recipe, so it re-renders at whatever size and moment the document asks for. Each scene box shows a still poster of itself, the selected one is live, and every export draws each scene again at the size that file needs. A studio link placed in another document, or embedded as a tool image, still arrives as a picture: it is rendered at export quality, at full samples and at its real size.
Motion
Motion chooses what the subject does over the loop. Loop seconds sets how long one loop takes and supplies the initial clip length; the export panel lets you override how much to record. Still image, the default, holds the subject where you put it, and the rest are loops.
- Turntable turns the subject through the turn angle over the loop.
- Hover floats the subject up and back down, with a small sway.
- Pulse breathes the whole subject in and out by a few percent, evenly.
- Wobble rocks the subject side to side three times and lets it settle.
- Pop winds up, collapses the subject away, then brings it back past its own size and settles.
- Coin flip throws the subject up through one whole flip and squashes it a little as it touches down.
- Jump crouches, stretches through the arc, squashes as it comes down and settles.
- Spin and land lifts the subject, drops it turning once, bounces it to a stop and holds it there.
- Burst breaks the subject into its own triangles, flies them out and brings them back whole.
Motion amount scales how far any of them travel: 1 is the motion as drawn, below 1 is quieter, above 1 is bolder. It does nothing for a turntable, which has Turn angle as its own scale. Rest between loops is how long Pop, Coin flip, Jump, Spin and land and Burst sit still at the end of the loop before they go again; Hover, Pulse and Wobble run without stopping.
Every loop starts and ends at the place you put the subject, so a poster or a contact sheet at time zero is the subject as you placed it.
The subject also keeps its footing. Whatever a loop does to its size or its tilt, its lowest point stays on the floor and only the loop's own lift takes it off, so a squash flattens onto the floor and a stretch grows upward. An arrangement moves as one group about the middle of its footprint. At the largest amount, every loop stays inside the studio's shadow.
Burst
Each triangle spins about its own centre, flies outward, falls a little and shrinks away, then the object comes back together. Nothing is random, so the same moment of a loop draws the same picture on every device and in every export. The cast shadow shatters with the object. Nothing fades: a piece shrinks rather than going see-through, so a burst works in every output, the cut-out ones included. Pieces fly about 2 studio units at a motion amount of 1.
Burst shatters up to 250,000 triangles per object. A heavier model keeps its whole shape and the Source notes line gives the count that refused it.
Camera moves
Beside holding the view still and travelling through your own keys, Camera offers five moves made from the view you have composed.
- Orbit sweep turns a little each way about the view you set and comes back.
- Push in comes closer over the loop. With Return to the first key off it holds the close view.
- Dolly zoom narrows the lens while the camera pulls back, and the subject stays the same size while the background slides. An orthographic camera has no lens to change, so the move does nothing there.
- Reveal turn swings in from one side, starting a little further back and at an elevation of 30 degrees, and settles on your view, once.
- Crane comes down from above onto your view while the framing closes in.
Camera amount scales how far a move travels. A dolly zoom always goes from a 60 degree lens to a 24 degree one, so the amount does not change it. Convert to keys on the preview turns any move into ordinary camera keys you can edit, as one step that undo takes back.
Light motion
Light motion animates the studio on its own: Orbit the studio sweeps the rig around the object and back; Gently breathe varies its intensity. Moving sources affect illumination, reflections and cast shadows. Brand light colours stay intact. Light motion amount controls the sweep or intensity range, and the lights return to their starting position and intensity at each loop boundary.
An object loop, a camera move and animated lights combine over the same loop seconds. A turntable closes its object pose only when its turn angle is a whole number of rotations.
What an edit redraws
Editing a studio rebuilds only what the edit changed. Moving the camera redraws the frame and, in a complete scene, the backdrop behind it. Moving a light rebuilds the lights alone. Changing a colour or a finish writes the materials onto the objects already in place, and only a change to the extrusion of an outline, its depth, bevel or curve detail, reads that artwork again. A model file is never read again for a camera, light, colour, finish or bevel change. The sample badge, sphere and box are drawn from the colour pair itself, so those are built again when a colour changes. Each of these steps is counted, so a test can prove an edit did no more work than it should.
Batch rows, contact sheets and preview tiles share two graphics contexts rather than opening one each, and a renderer handed back keeps its environment and backdrop for the next one.
If an export stops before it finishes, the studio takes itself back after thirty seconds, records why in the browser console and checks its next frame. A preview that is still loading when you leave the tool stops there instead of reporting a failure. A frame that comes out empty fails that export rather than saving a blank picture, and that check reads the pixels for a cut-out surface, one drawn with a clear-edged texture or a nearly clear opacity, instead of counting it as nothing.
Current limits
- SVG: up to 1 MB, 128 paths and 16 solid colours. Convert text, linked content, filters, masks, gradients and transformed or dashed strokes to plain filled paths first. Very narrow or acute features may need a smaller bevel or no bevel.
- Models: self-contained glTF 2.0 GLB or STL, up to 32 MB and one million triangles. Export GLB without Draco, Meshopt or KTX2 compression. Embedded textures may be up to 8192 pixels per side. Model animation clips are not played.
- Model size: the studio always scales the longest side to 3.25 studio units, so a bolt and a building photograph the same. The Source notes line says what the file itself measures, in the form
Model spans 120 by 48 by 9 units in its file; shown at 3.25 studio units., so you can tell the two apart. Artwork, words and the built-in shapes report no size, because they are drawn to fit. - STL supplies a visual mesh. The studio normalizes its size for photography and does not infer print units or certify a printable object. Native CAD documents must first be exported as a supported mesh.
- Output: SDR rendering, up to 4096 pixels per side and 12 million pixels total. Preview uses fewer samples than export. A WebGL2 device with float render targets is required.
- Arrangements: up to 16 objects and one million visible triangles. Objects share one extrusion depth and bevel. Separate render passes and editable mesh export are not yet available.
- Environments: Radiance
.hdrand OpenEXR.exrup to 64 MB and 8192 by 4096 pixels. Illumination and reflections share one strength, and image-based light casts no shadows of its own.
Lighting is rasterized with sampled shadows and a reflection environment. It does not simulate full path-traced light transport. Transparent shadows retain the saved camera and ground plane; they do not relight another image after export.